Using Jupyter via OnDemand
Jupyter is an interactive web-based environment for creating and using Jupyter notebooks, documents containing live code and visualisations. While many languages are supported by Jupyter, Python notebooks are very commonly used. Please refer to the overview section for instructions on how to login to OnDemand.
Starting a Jupyter session
We offer separate apps for JupyterLab and Jupyter Notebook.
If your code does not specifically use GPU acceleration and/or you do not have access to GPU-enabled nodes, then choose "CPU" from the Job type dropdown box.
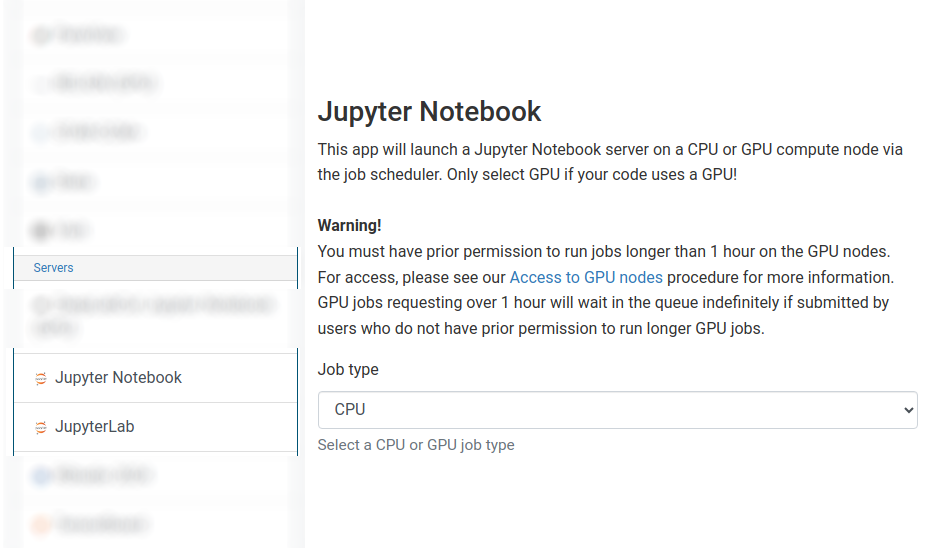
The form is dynamic and will adjust depending on the job type selected.
For CPU jobs, you can choose the number of cores and quantity of RAM required.
Request 1 core for most Jupyter CPU jobs
Many Jupyter notebooks will only use 1 core, therefore any additional cores requested will be allocated but not utilised.
For GPU jobs, you can only request a single GPU and the core and RAM request is automatically set for you.
Choosing a 1 hour maximum running time is the best option for getting a session quickly, unless you have access to owned nodes which may also provide sessions immediately for up to 24hrs for CPU jobs or 24hrs for GPU jobs if resources are available.
Once clicking Launch, the request will be queued, and when resources have been allocated, you will be presented with the option to open the session.
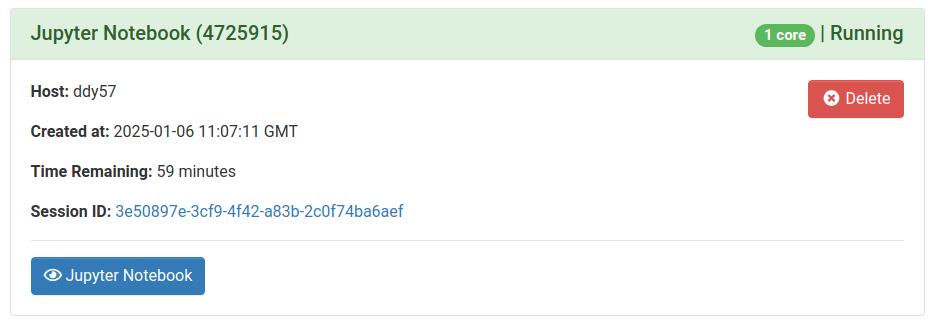
Here you can see the compute host that the session has been scheduled on, and time remaining for the session.
Clicking the blue Jupyter Notebook or JupyterLab button will open the familiar Jupyter session window, from which you can open notebooks.
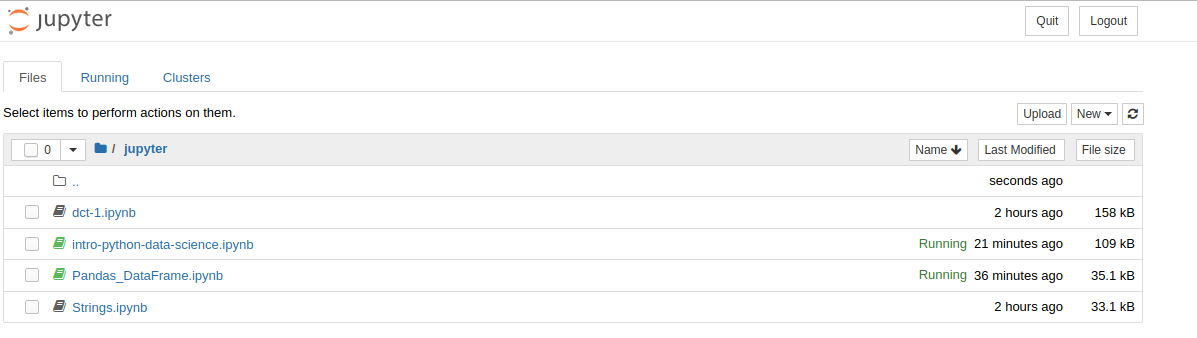
And in action:
Jupyter installation
Central Jupyter installation
When launching a new JupyterLab or Jupyter Notebook session on OnDemand, you will notice a checkbox called "Use a personal Conda env rather than a module to provide Jupyter Notebook/Lab". If you un-check this box, the form will look something like this:
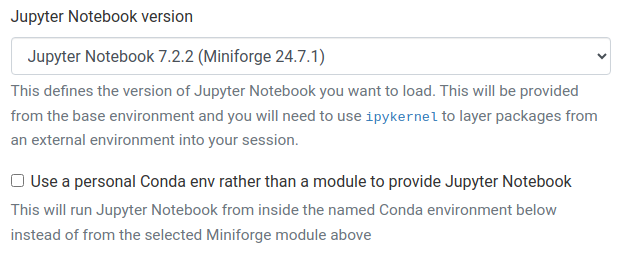
In this case, Jupyter will be provided as a fixed version installed by ITSR and loaded automatically. You will be unable to install any additional extensions or otherwise modify this installation of Jupyter at all. You will only be able to use additional Python packages by creating an IPython kernel for a separate environment as detailed below.
Less experienced users may wish to start with this approach, to avoid breaking Jupyter.
Personal Jupyter installation
Don't break Jupyter
Whilst using a personal Conda environment for Jupyter offers more versatility compared to using our provided central Jupyter installation, be careful not to break your personal installation of Jupyter, especially when using extensions.
If you check the "Use a personal Conda env rather than a module to provide Jupyter Notebook/Lab" box when launching Jupyter, the form will change and look something like this:
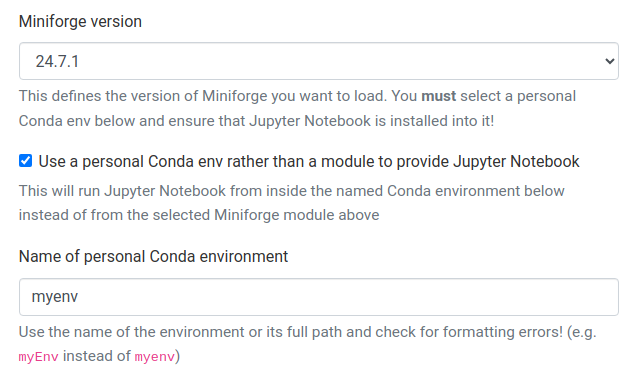
This allows you to directly use a personal Conda environment to provide Jupyter, and allows the use of some, but not all, Jupyter Extensions like GPU utilisation dashboards etc.
Dask is not supported
Even when using a personal Conda environment, complex Jupyter extensions such as Dask will not work due to security limitations and protocols on Apocrita.
You must install JupyterLab and/or Jupyter Notebook yourself
When using a personal Conda environment, you must install JupyterLab and/or Jupyter Notebook yourself into the activated environment:
mamba install -c conda-forge jupyterlab -y
mamba install -c conda-forge notebook -y
Anaconda and Miniconda are no longer available on Apocrita due to licensing issues and have been replaced by Miniforge.
Don't use a Python virtualenv for Jupyter
Using a Python virtualenv alongside Jupyter is not recommended, as there can sometimes be dependency clashes. Please use a Conda environment combined with one of the methods below for using it with Jupyter.
Using environments
The default installation of Miniforge, which we are using, provides a small number of Python packages as standard. However, if you need you use modules outside of the default list provided by Miniforge, you will need to use the approaches below.
Pick one approach initially
Personal Conda environments are a lot more versatile, but it is much easier to totally break Jupyter when using them. Less experienced users may wish to stick to only the IPython kernel approach initially.
Checking which Conda environment is currently active
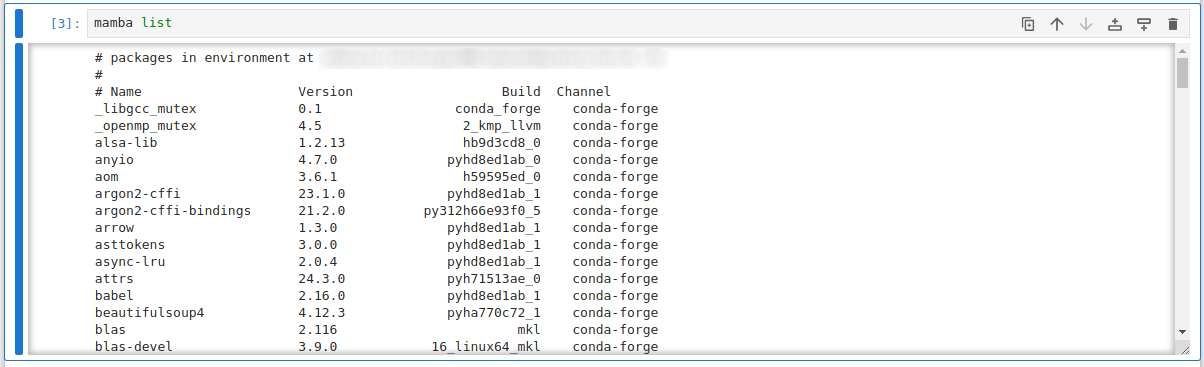
Whether using a Personal Conda Environment or an Ipython kernel, you can check
which Conda environment is currently in use, and a list of packages installed
into it, using the mamba list command in a cell, e.g.:
IPython kernel
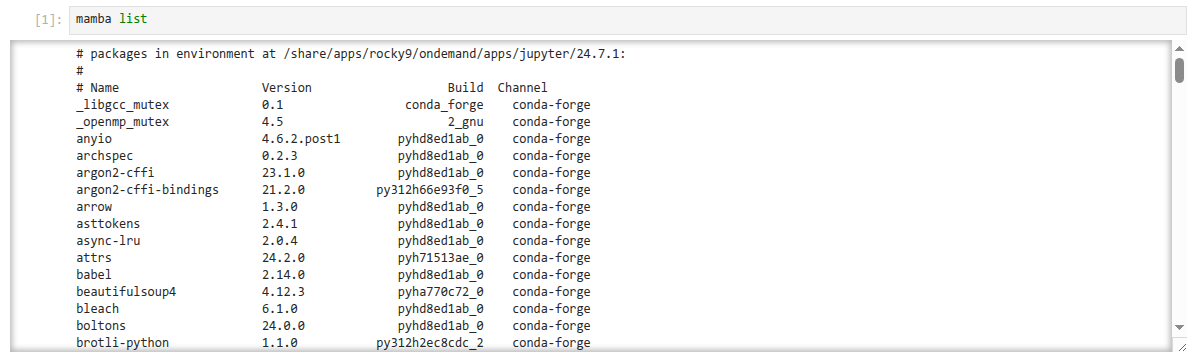
Once in your Jupyter session, if you've used our centrally provided installation
of Jupyter, the default kernel ("Python 3 (ipykernel)") will activate
packages from the base Conda environment for that version:
To use additional Python packages, we can use an
Ipython kernel.
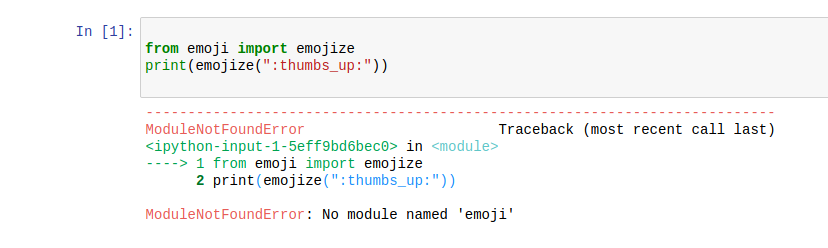
We will demonstrate the use of IPython kernel by attempting to use the emoji
module to display emojis. The base Conda environment does not contain this
package.
In a Jupyter notebook, attempting to load the emoji module will fail.
We will need to create a new Conda environment containing our desired packages.
Installing the emoji package into an activated environment will allow us to
use it on the command line interface, but to also make it visible to Jupyter we
need the ipykernel package, and a command to activate it.
We can perform this on Apocrita as follows:
module load miniforge

# use -y to accept the y/n question, -q to reduce verbosity
mamba create -n emoji_env -y -q
mamba activate emoji_env

# add the desired packages to the env
# we need to specify the conda-forge channel to install the emoji package
mamba install -c conda-forge emoji ipykernel -y -q

# make the env visible to Jupyter
python -m ipykernel install --user --name emoji_env

# deactivate your env
mamba deactivate
Note that the ipykernel package and subsequent command are only required to
make the environment visible to Jupyter.
If you already have an existing Conda environment myenv but you wish to make
it visible to Jupyter, simply activate your environment:
mamba activate myenv
and run:
mamba install ipykernel -y -q
python -m ipykernel install --user --name myenv
Now if you open a new Jupyter session from OnDemand, you will notice that the
new environment is available under the Kernel -> Change Kernel menu, with the
name we provided with the --name option. Similarly, it will be available as an
option under the File -> New notebook menu in addition to the default
Miniforge Python 3 environment.
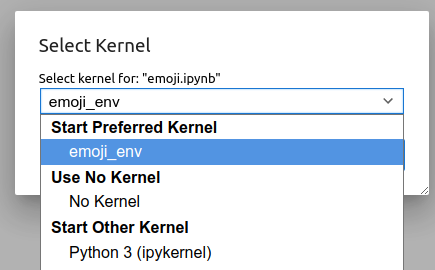
Now if you open a new notebook, you can now use the emoji_env we created.
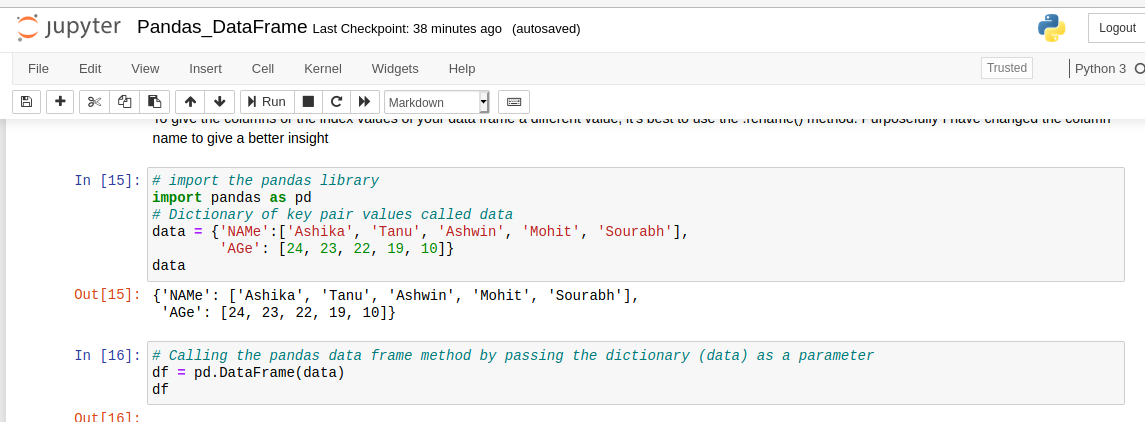
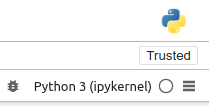
Note that the currently active environment is displayed in the top right
corner.

Using this method, if you have notebooks requiring packages in addition to the defaults, you can now maintain different environments to support use of those notebooks.
Personal Conda environments
Once in your Jupyter session, if you've used a Personal Conda Environment to provide Jupyter, the default kernel ("Python 3 (ipykernel)") will activate packages from that same Conda environment:
When using a Personal Conda Environment, you can either add additional packages directly into the same environment you run Jupyter from, or you can choose to use the IPython kernel approach above to layer in packages from an additional environment. The Ipykernel approach allows quicker on-the-fly switching of environments without having to launch an entirely new Jupyter session, but is less versatile when you want to use things like Jupyter extensions, which often need to be installed alongside Jupyter directly.
Using R packages
Installing R packages
If you wish to use R packages within Jupyter, please install them into a personal Conda environment as detailed in this blog post:
https://blog.hpc.qmul.ac.uk/R-conda/
Installing the R kernel
do not use install.packages inside an R kernel
Due to the way the R kernel works within Conda, attempting to use the
install.packages method inside an R kernel will install R packages
outside of the Conda environment, which may cause unforeseen conflicts
when running the native R application, via a module.
To install the R kernel, run the following commands as a one-off setup:
When using a personal Conda environment for Jupyter
Install JupyterLab or Jupyter Notebook first
You must install JupyterLab and/or Jupyter Notebook into the environment before installing the R kernel.
qlogin -l h_vmem=10G
module load miniforge
mamba create -n R -y -q
mamba activate R
mamba install -c conda-forge jupyterlab notebook -y
mamba install -c conda-forge r-recommended r-irkernel -y
R -e 'IRkernel::installspec()'
When using Ipython kernel
Match your Jupyter module version
Change <version> below to match the Jupyter Lab/Notebook version you
select in the OnDemand session form.
qlogin -l h_vmem=10G
module load /share/apps/rocky9/environmentmodules/apocrita-modules/ondemand/jupyter/<version>
mamba create -n R -y -q
mamba activate R
mamba install -c conda-forge r-recommended r-irkernel -y
R -e 'IRkernel::installspec()'
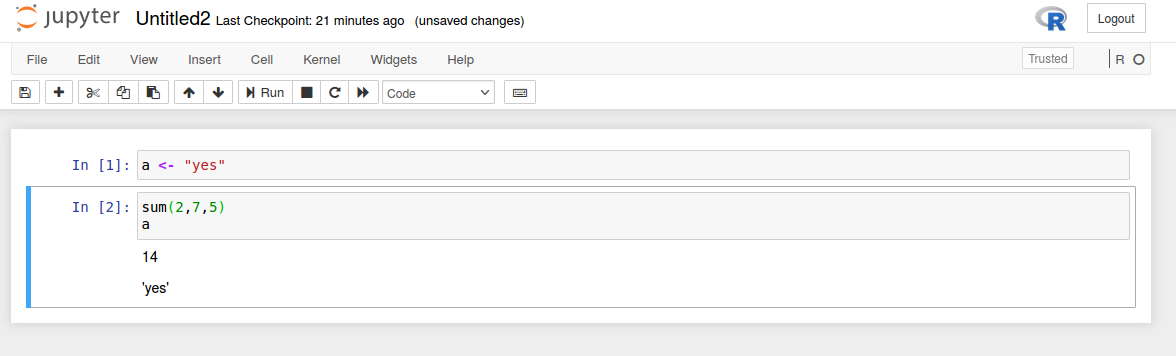
The R kernel will now be available as an option within Jupyter Notebook when
starting a new notebook, or under the Kernel -> Change kernel menu:
To uninstall the R kernel, simply run mamba env remove -n R (or delete the
environment install directory) and also delete the kernel specification
directory with rm -r ~/.local/share/jupyter/kernels/ir/.